Upcycled Oil Barrel Dining Set: A DIY Welding Adventure
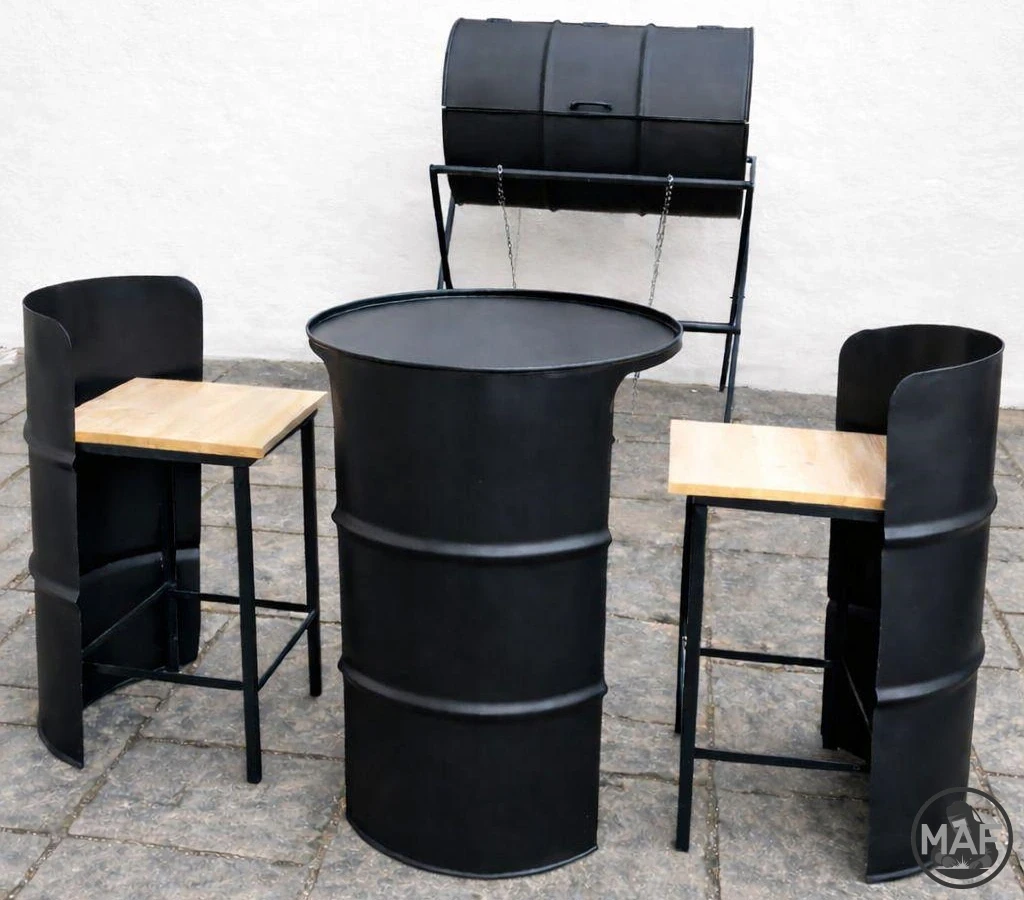
Upcycled Oil Barrel Dining Set
One of the most impactful early projects in my welding and fabrication journey was this dining set made from a recycled oil barrel. It pushed my skills in ways I didn’t expect—especially working with extremely thin sheet metal—and it remains one of the most rewarding builds I’ve completed.
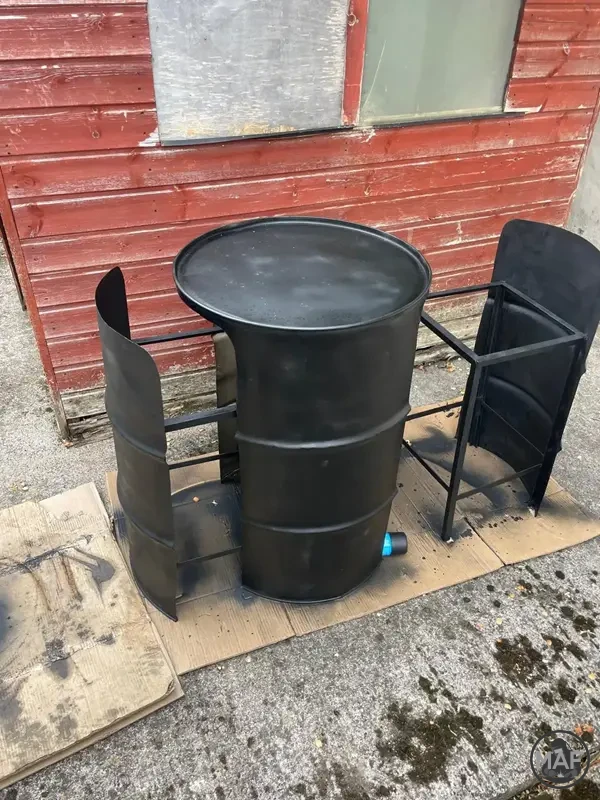
What made this project particularly interesting was the complexity. From a single oil barrel and a handful of angle iron, I created two chairs and one table. Considering the barrel was made from roughly 0.5 mm sheet steel, it was a great challenge in precision and heat control.
Beyond the technical side, I also loved the creative possibilities. An oil barrel can be transformed into so many things—a man cave centerpiece, an arcade bar feature, or even a micro pub essential. This project really opened my eyes to how versatile reclaimed materials can be.
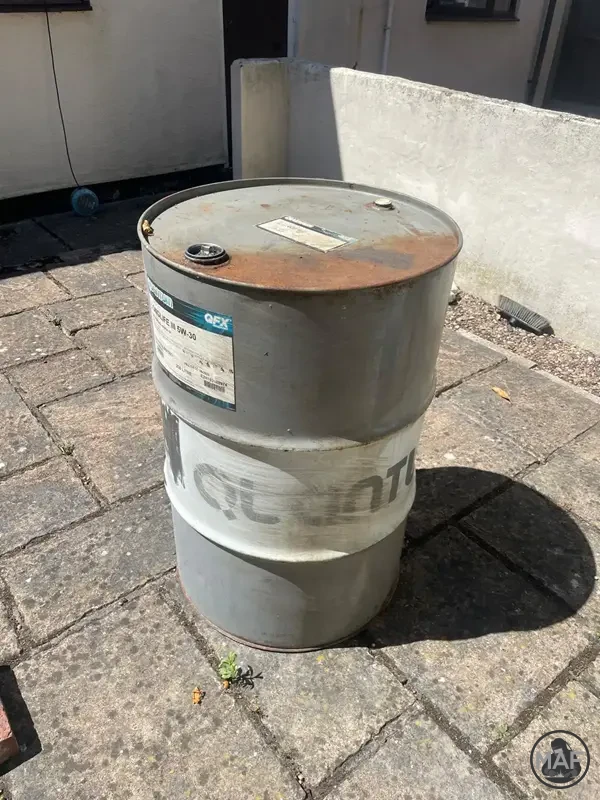
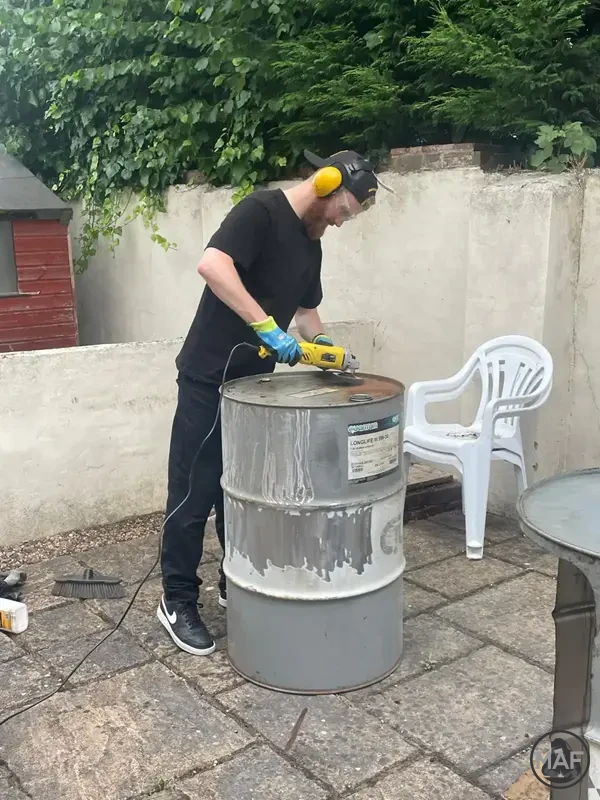
Stage 1: Cleaning and Stripping the Barrel
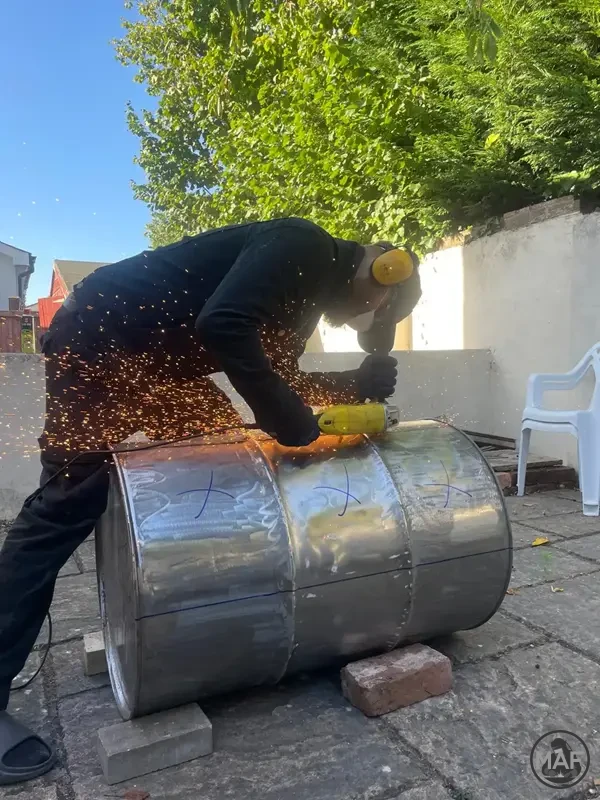
The first step was preparing the barrel, which meant removing any leftover oil and stripping the exterior paint.
Since this was my first time doing something like this, I had to experiment a bit. After looking into a few options, I filled the barrel with hot water and added about half a bottle of degreaser. I may have also added some washing-up liquid for good measure. This combination worked well to break down any remaining oil residue.
Once cleaned, I moved on to removing the paint. Using a paint stripper disc on my angle grinder made this surprisingly quick and effective—I had the barrel stripped back to bare metal in about 30 minutes.
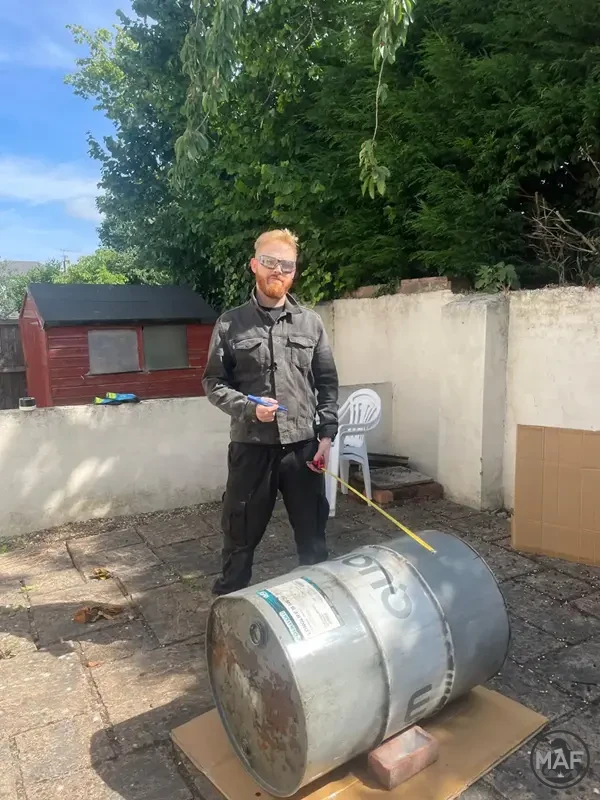
Stage 2: Measuring and Cutting
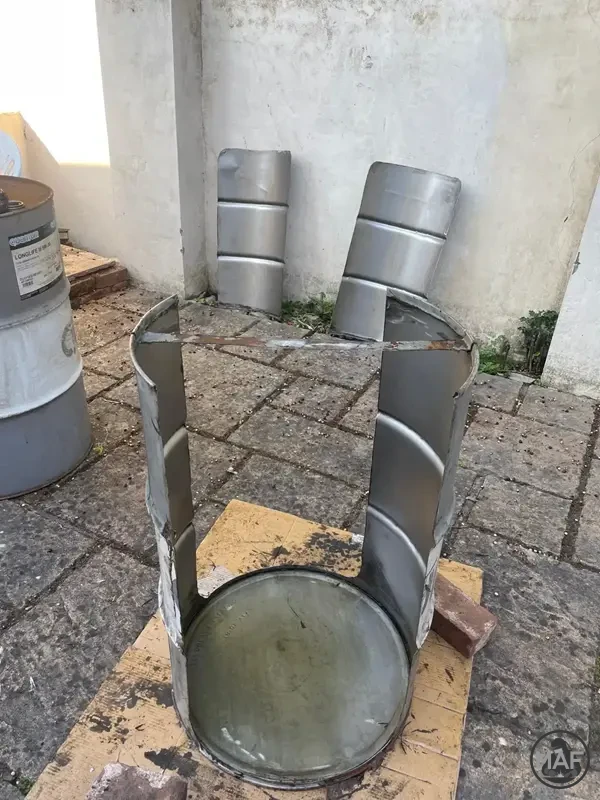
Next came marking out the cuts. This stage was all about accuracy but was fairly straightforward.
Using a tape measure and marker pen, I plotted consistent, repeatable lines around the barrel. Once everything was marked, I used an angle grinder to make the cuts.
After cutting, I used a flap disc to deburr the sharp edges and smooth the surfaces. This not only made the pieces safer to handle but also prepared them for painting later on.
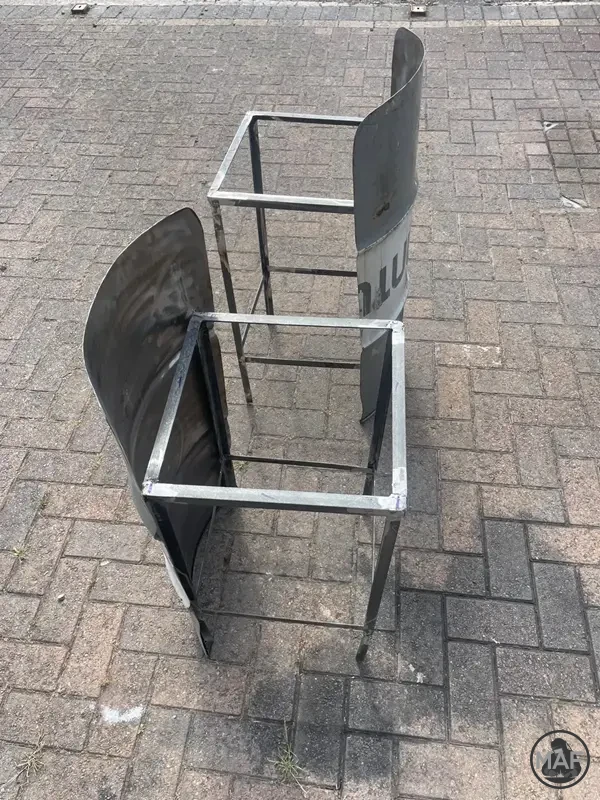
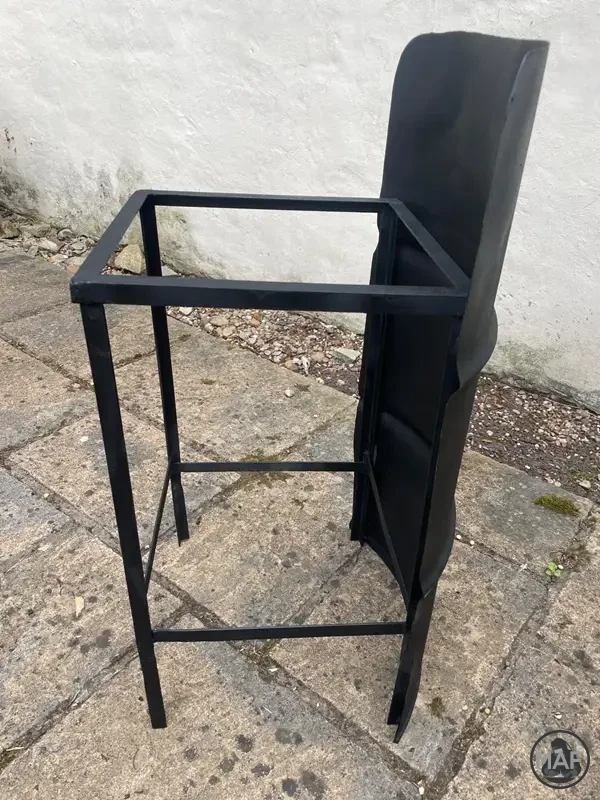
Stage 3: Fabricating the Chair Frames
With the barrel sections cut, I moved on to building the internal frames for the chairs.
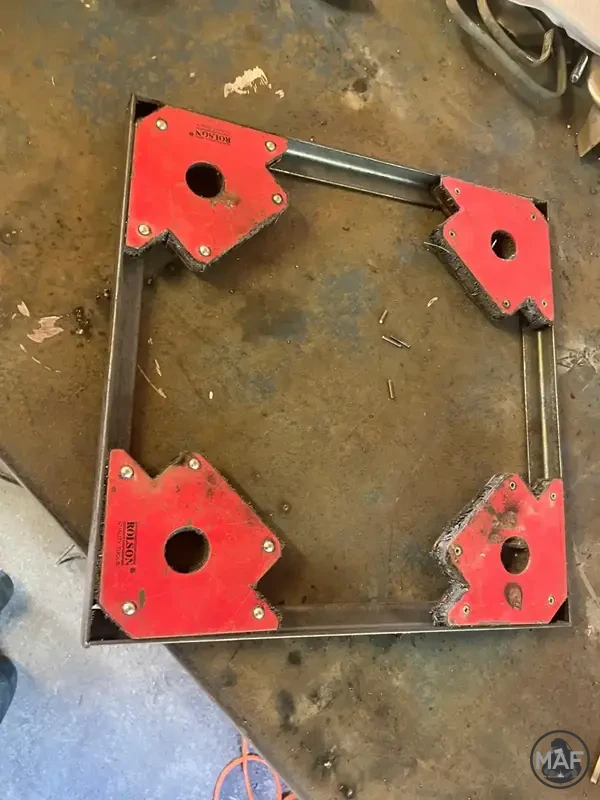
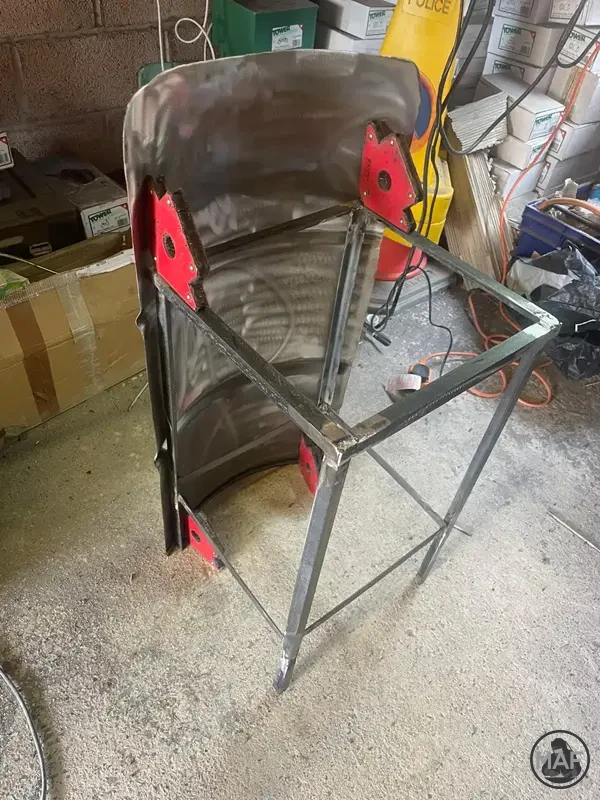
This was actually one of the easier stages. I used welding magnets to hold the frame components in place while I tack welded them together. Getting this part right was important, as it forms the base where the wooden seat and legs are attached.
The legs, made from angle iron, were positioned so the seat overlapped them slightly—this added extra strength and stability. Once I was happy with the alignment, I fully welded everything using 6013 stick electrodes.
Stage 4: Attaching the Barrel Sections
At this stage, I welded the cut sections of the oil barrel onto the chair frames.
Because the barrel steel was so thin (around 0.5 mm), I had to be careful not to burn through it. One technique that worked really well here was using a heat sink—placing a thicker piece of metal behind the weld area to absorb excess heat.
After welding, I cleaned up the joints using a grinding disc followed by a flap disc, smoothing everything out in preparation for painting.
Stage 5: Reinforcing the Table
To strengthen the table, I added a simple internal frame using 20 mm x 3 mm flat bar.
These were welded across the top, bottom, and sides of the barrel, creating a rigid, picture-frame-like structure. This step didn’t take long but made a big difference to the overall strength of the table.
After welding, I ground the welds back for a clean finish.
Stage 6: Painting
With all fabrication complete, it was time to paint.
I applied two coats of fast-drying black acrylic spray paint, allowing the first coat to flash off before applying the second. The set was then left overnight to dry fully, with a few touch-ups done the next morning where needed.
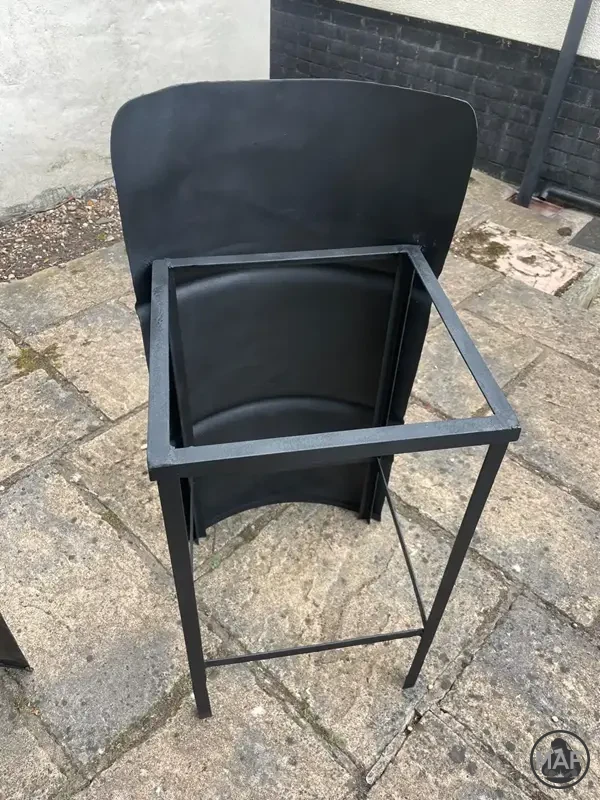
Stage 7: Final Assembly
The final stage was fitting the wooden seats and adding edge protection.
The wooden seats were secured using M8 threaded fixings, aligned with pre-drilled holes in the frame. For safety and a cleaner finish, I installed a rubber edge trim (similar to car door trim) around any exposed metal edges. This was secured with both its built-in grip and additional adhesive to ensure it stayed firmly in place.
Final Thoughts
This project taught me a lot—especially about working with thin materials, controlling heat, and planning multi-part builds. It also showed me just how much potential there is in recycled materials.
From a single oil barrel to a complete dining set, this build was a great example of turning something simple into something functional, durable, and visually striking.
Projects
Project 1
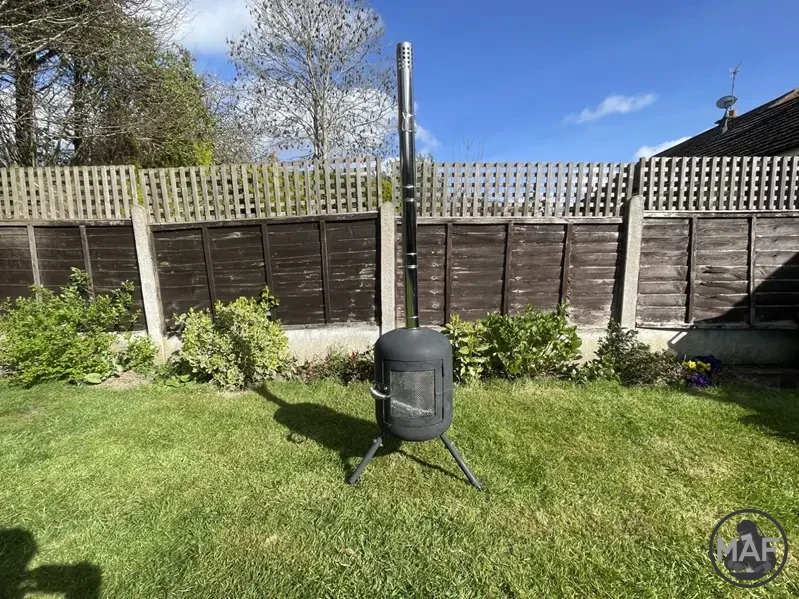
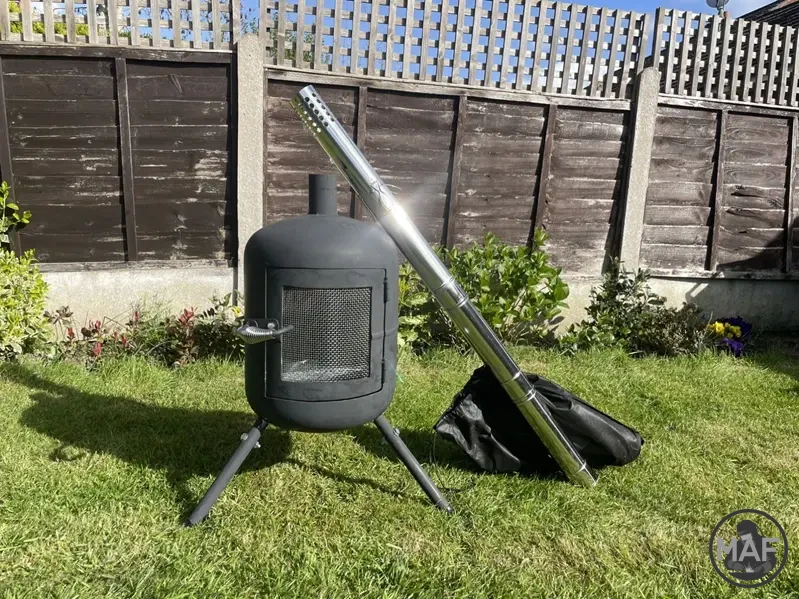
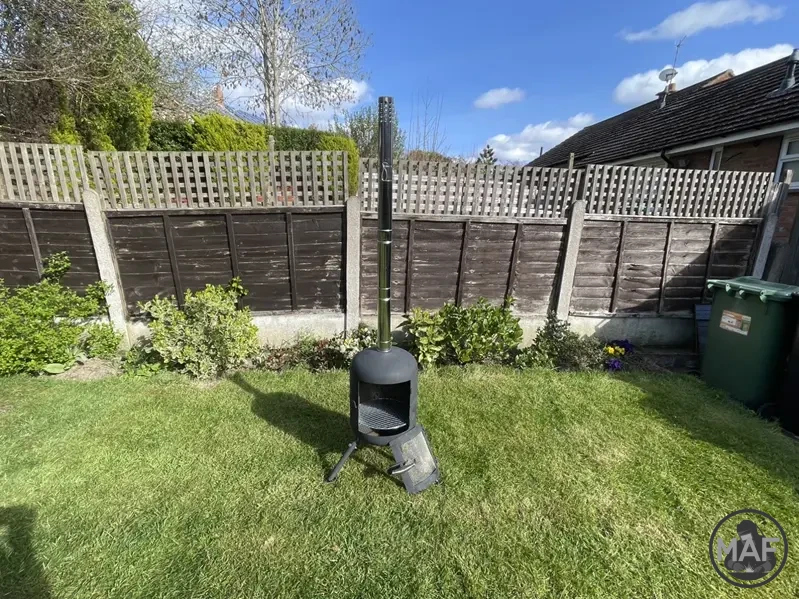
This project started out from as a old LPG bottle...Upcycling a LPG Gas Bottle into a Log Burner
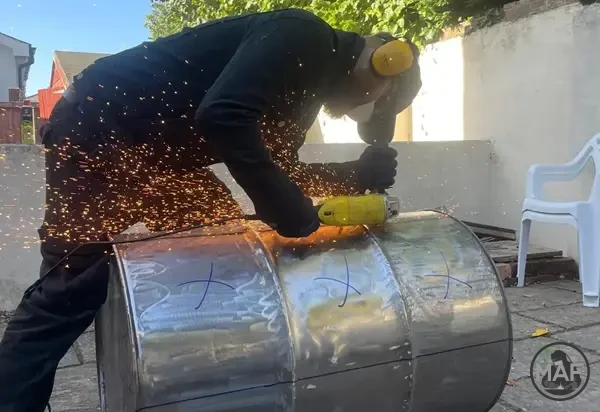


This is where things get interesting. A collection of builds, experiments, and the occasional challenge that seemed like a good idea at the time. Each project is documented with a focus on process, problem-solving, and the reality of working with metal—no shortcuts, no glossing over mistakes. If you’re looking for ideas or insight, this is the place. We also get commissioned to build some of our projects in customer’s backyards / gardens, just so they can follow our processes and watch it unfold.
Last updated: 22 Apr 2026